Monday, May 15, 2023

Where to buy?

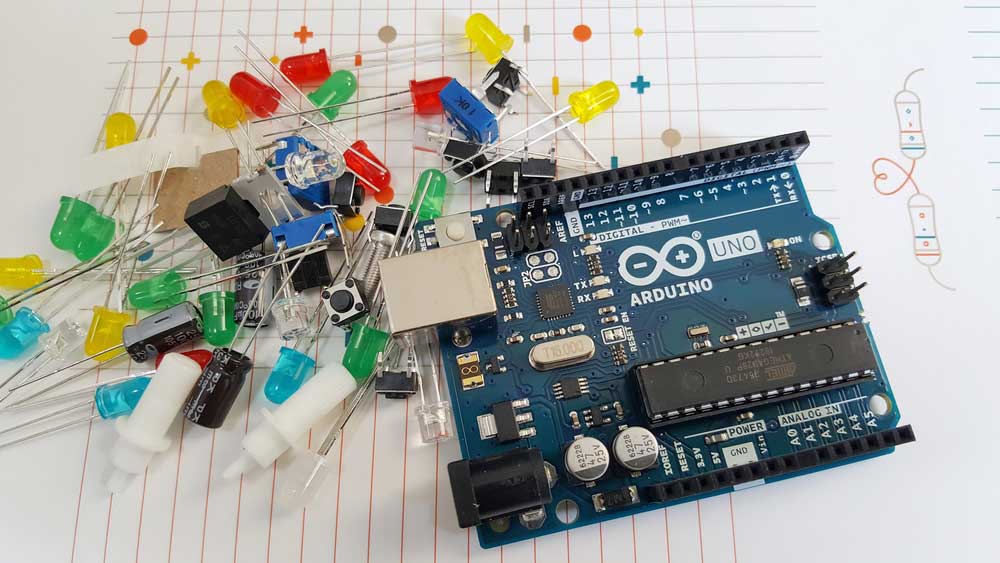
Introducing latest project powered by Arduino! Looking to bring your creative ideas to life? With our Arduino products, the possibilities are endless. Whether you're a beginner or an experienced maker, our easy-to-use platform provides you with the tools and resources to turn your ideas into reality.

Arduino products are perfect for anyone interested in electronics, coding, or robotics. With a range of boards, kits, and accessories, you can customize and tailor your project to your specific needs. And with vast community of makers, you'll have access to a wealth of knowledge, inspiration, and support.

But don't just take our word for it - see what customers have to say. From home automation to robotics, our Arduino products have been used in a variety of exciting projects.

Ready to get started? Click the link below to explore Arduino products and join the millions of makers worldwide who have brought their ideas to life with Arduino.

Click this: Arduino in Shoppee


Thursday, May 11, 2023

Encouragement

Arduino is a fascinating and versatile tool that can be used for a wide range of applications. Hopefully, this introduction has given you a good understanding of what Arduino is, how it works, and the possibilities it offers. Don't be afraid to experiment and explore with your own projects, and continue learning and expanding your knowledge of Arduino. There are many resources available online, from tutorials and forums to communities of Arduino enthusiasts who are always happy to share their knowledge and offer support. So, keep exploring and have fun with Arduino! 

Recap

In this topic, we provided an introduction to Arduino, its components, and its programming language. We explained the process of creating and uploading sketches to the Arduino board, as well as the different types of Arduino boards available. We also discussed the materials needed to start an Arduino project and how to set up the Arduino software and connect it to the board.

Furthermore, we provided a step-by-step guide to building a simple Arduino project and explained the components used and how they work together. We also provided tips and tricks for troubleshooting and testing the project.

Finally, we discussed more complex Arduino projects and their capabilities, as well as provided resources for finding inspiration and project ideas. We also introduced different sensors and actuators that can be used with Arduino.

Introduction to the different sensors and actuators that can be used with Arduino

Arduino boards can interface with a wide range of sensors and actuators, making it a versatile tool for creating interactive projects. Sensors are devices that detect changes in the environment and convert them into electrical signals, while actuators are devices that convert electrical signals into physical actions. Here are some examples of sensors and actuators that can be used with Arduino:

1. Light sensors: Photoresistors or photodiodes can be used to detect changes in light levels.


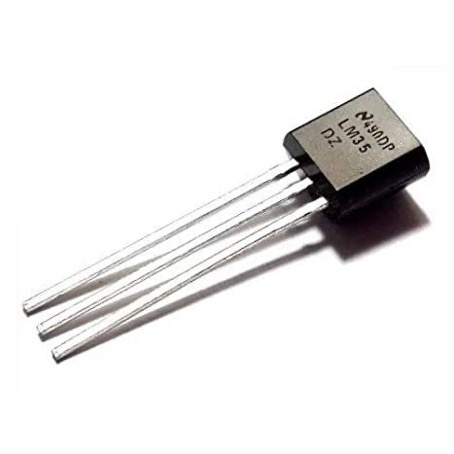
2. Temperature sensors: Thermistors or temperature sensors such as the DS18B20 can be used to detect changes in temperature.

3. Motion sensors: PIR sensors or ultrasonic sensors can be used to detect motion.


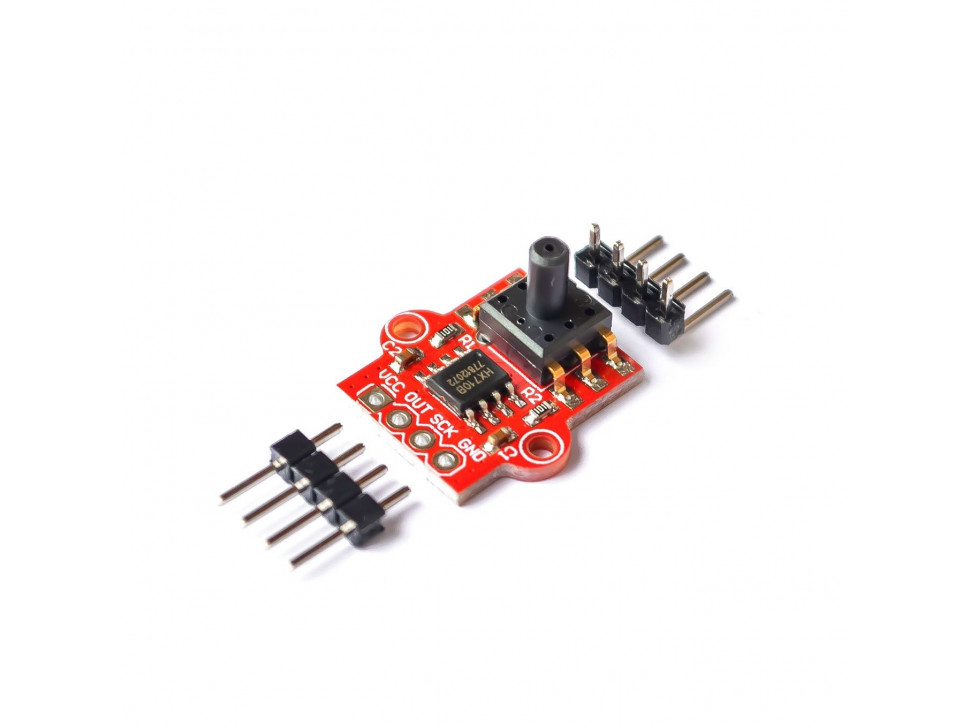
4. Pressure sensors: Barometric sensors or force sensors can be used to detect changes in pressure.

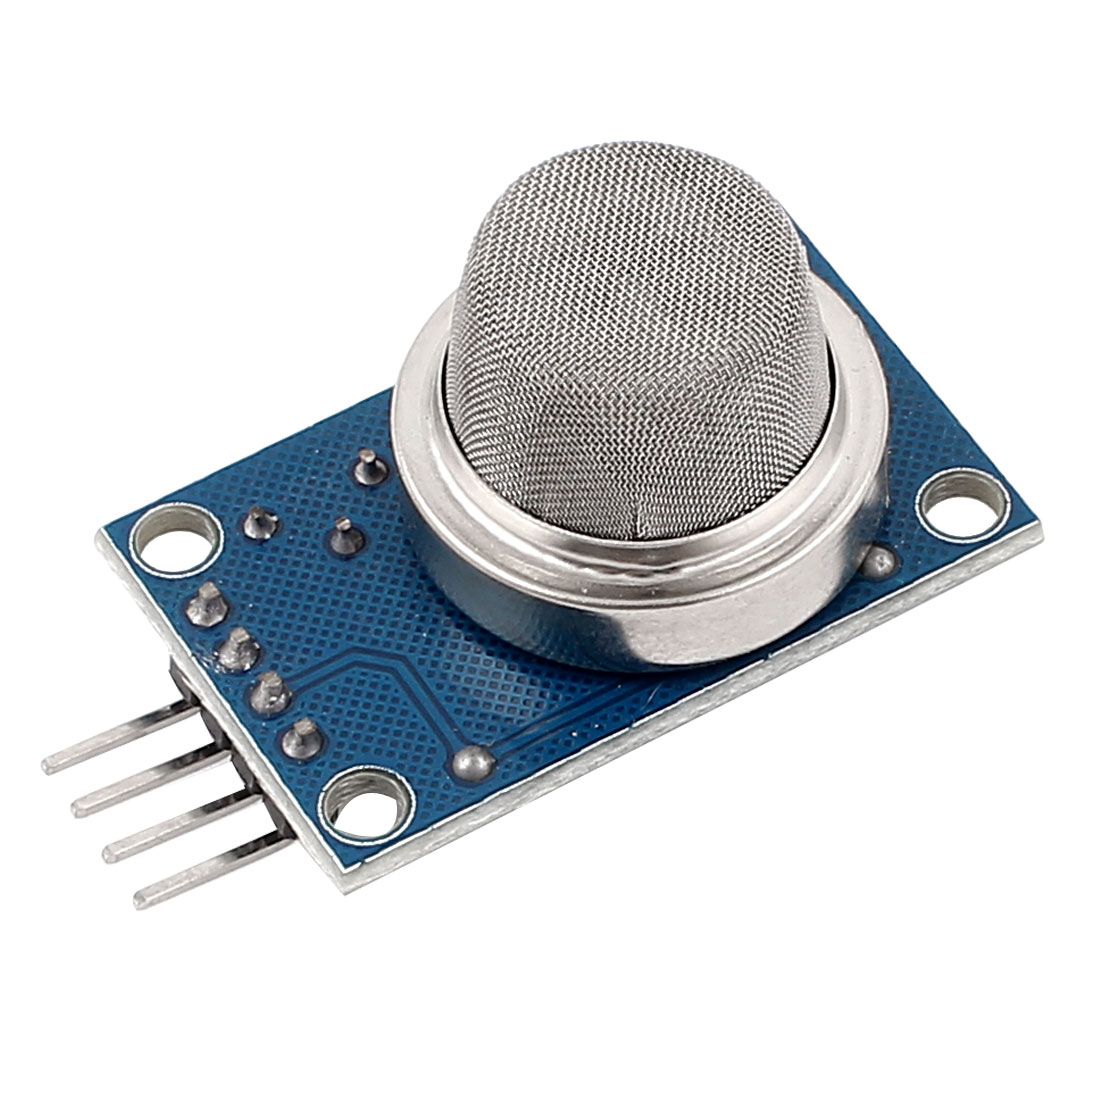
5. Gas sensors: Gas sensors can be used to detect the presence of specific gases in the environment.


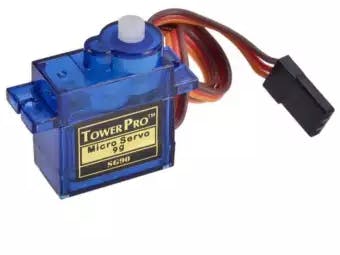
6. Servo motors: These are small motors that can be used to control the movement of objects.

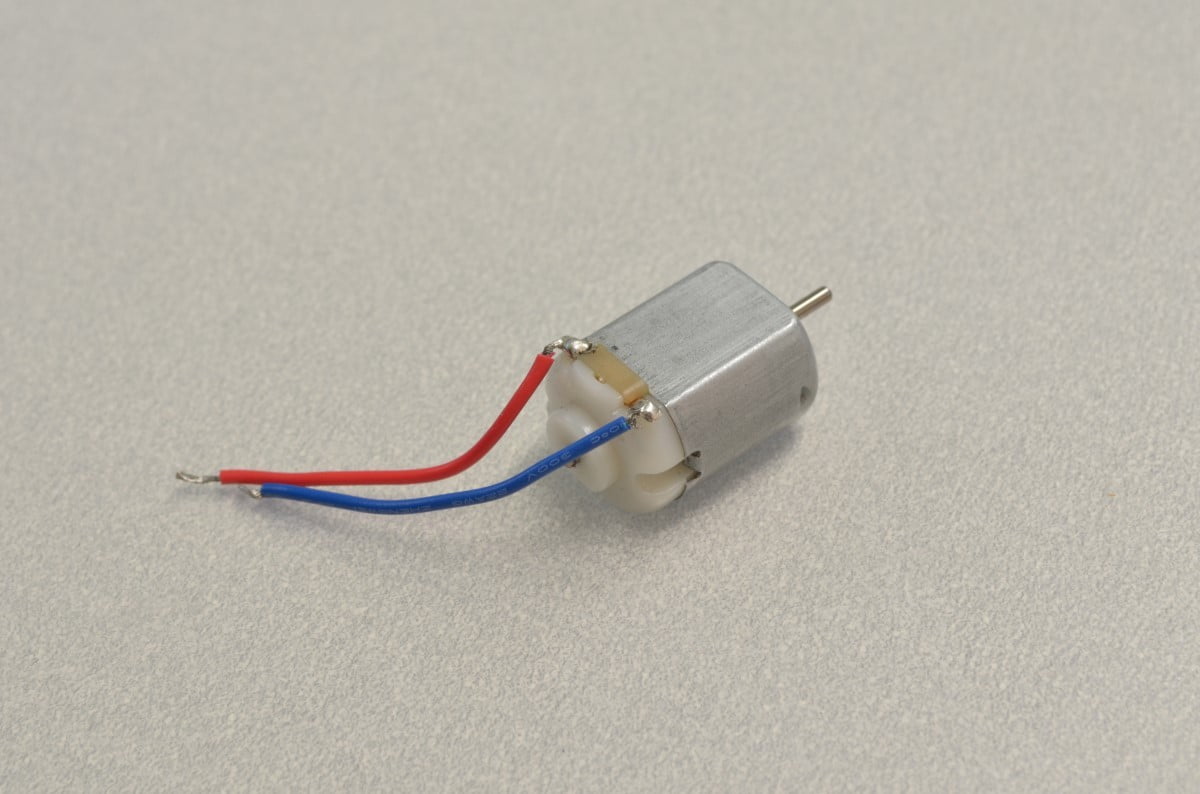
7. DC motors: These motors can be used to create movement in a specific direction.


8. Stepper motors: These motors can be used for precise control of movement, such as in robotic arms.


9. LED displays: These displays can be used to display text or graphics.


10. LCD displays: These displays can be used to display text, graphics, or sensor data.


By combining these sensors and actuators, complex projects such as home automation systems, weather stations, or even robots can be built using Arduino. There are a variety of resources available online, such as tutorials, forums, and project ideas, to help beginners get started with using sensors and actuators with Arduino. 


Resources for finding inspiration and project ideas

There are many resources available for finding inspiration and project ideas for Arduino. Here are a few suggestions:

1. Arduino Project Hub: This is an official website maintained by Arduino that features a wide range of projects submitted by users. You can search by category, difficulty level, or specific components.

2. Instructables: This is a website that features user-created tutorials for a variety of projects, including many Arduino projects. You can search by category or keyword to find specific projects.

3. Hackster: This is a website that features projects created by makers and developers using a variety of hardware platforms, including Arduino. You can search by category, difficulty level, or specific components.

4. YouTube: There are many YouTube channels that feature tutorials and project ideas for Arduino. Some popular channels include "GreatScott!", "The Arduino Guy", and "Jeremy Blum".

5. Arduino forums: There are many online forums dedicated to Arduino, where users can share their projects, ask for help, and get inspiration from others.

By exploring these resources, you can find a wealth of project ideas and inspiration for your own Arduino projects.

 More complex Arduino projects can accomplish a wide range of tasks, from automating home appliances to creating interactive art installations. Some examples include:

1. Home automation: Arduino can be used to control lighting systems, air conditioning, and other home appliances. You can program the Arduino to turn on the lights when you enter a room, adjust the temperature based on your preferences, or even set up a smart irrigation system for your garden.

2. Robotics: Arduino is a popular platform for building robots. With the right components and programming, you can create a robot that can navigate, detect obstacles, and perform a variety of tasks.

3. Data logging: Arduino can be used to collect data from sensors and other devices and store it on an SD card or transmit it wirelessly to a computer. This is useful for monitoring environmental conditions, tracking vehicle performance, or analyzing the behavior of industrial machinery.

4. Wearables: Arduino can be used to create wearable technology, such as fitness trackers, smart watches, and even clothing that lights up or changes color in response to external stimuli.

5. Music and sound: Arduino can be used to create musical instruments, sound installations, and other audio-related projects. You can use it to control synthesizers, create MIDI interfaces, or build your own electronic drum kit.

These are just a few examples of the many complex Arduino projects that can be accomplished with some creativity and know-how. The possibilities are virtually endless, and the only limit is your imagination.

Tips and tricks for troubleshooting and testing the project

 Here are some tips and tricks for troubleshooting and testing your Arduino project:

1. Double-check your connections: Make sure that all the components are connected to the correct pins on the Arduino board and that there are no loose connections.

2. Test each component individually: Before putting everything together, test each component separately to ensure that it is functioning properly.

3. Use the serial monitor: The serial monitor is a useful tool for debugging and troubleshooting your code. It allows you to print out values and messages from your program in real-time, making it easier to identify errors.

4. Check your code for errors: Make sure that your code is free of syntax errors and logical errors that may cause unexpected behavior.

5. Use external power: Some projects require more power than can be supplied by the USB port. In such cases, it is recommended to use an external power supply.

6. Use a breadboard: A breadboard can be a useful tool for prototyping and testing your circuit before soldering everything together.

7. Seek help online: There are many online forums and communities dedicated to Arduino where you can ask for help or advice if you run into any problems.

By following these tips and tricks, you can ensure that your Arduino project runs smoothly and functions as intended.

Building Your First Arduino Project

A step-by-step guide to building a simple Arduino project:

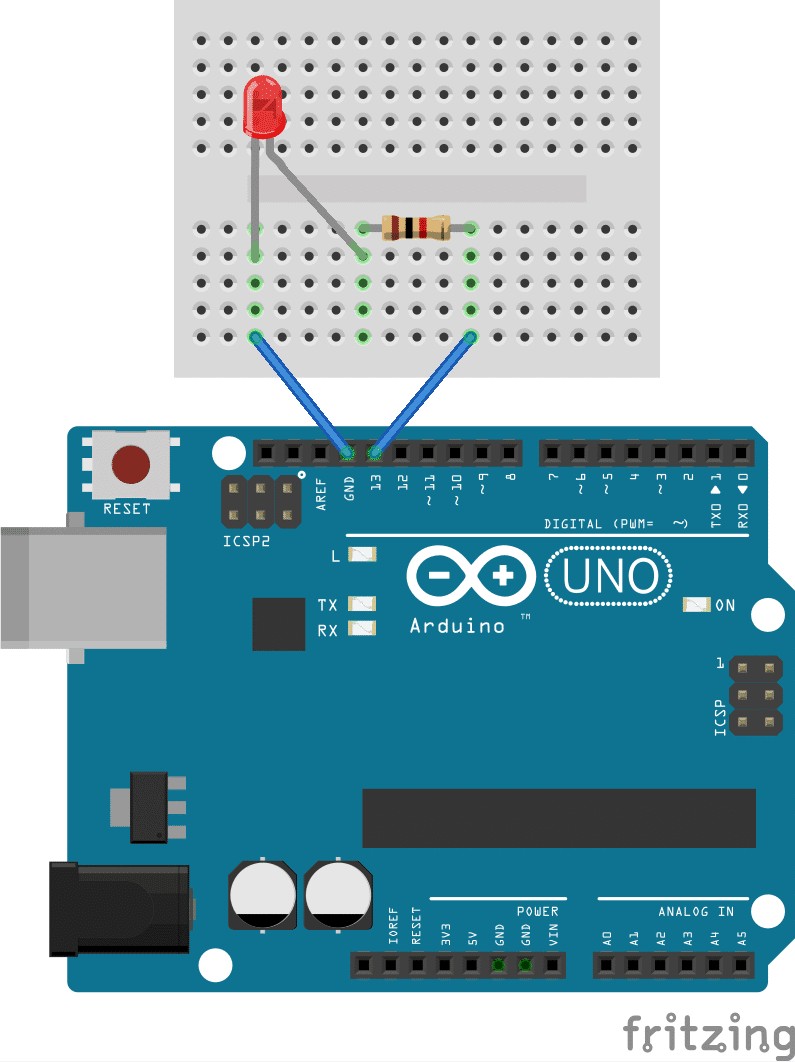
  1. Gather your materials: You will need an Arduino board, a breadboard, some jumper wires, and an LED.

  2. Connect the breadboard to the Arduino: Place the breadboard next to the Arduino and connect it using jumper wires. Make sure that the power rails on the breadboard are connected to the 5V and GND pins on the Arduino.

  3. Connect the LED to the breadboard: Insert the LED into the breadboard, making sure that the longer leg (the positive leg) is connected to the power rail and the shorter leg (the negative leg) is connected to a resistor.

  4. Connect the resistor to the breadboard: Insert the resistor into the breadboard, connecting one end to the negative leg of the LED and the other end to the ground rail.

  5. Write the code: Open the Arduino software and write a simple program that will turn the LED on and off. Here is an example code:

 void setup() {

  pinMode(13, OUTPUT);

}


void loop() {

  digitalWrite(13, HIGH);

  delay(1000);

  digitalWrite(13, LOW);

  delay(1000);

}


  1. Upload the code to the Arduino: Connect the Arduino to your computer using a USB cable and upload the code to the board using the Arduino software.

  2. Test the project: Once the code has been uploaded, the LED should start blinking on and off at one-second intervals. Congratulations, you have successfully built your first Arduino project!

Note: Always make sure to follow proper safety procedures when working with electronics, such as disconnecting the power source before making any changes to the circuit.

Basic functions and syntax of the Arduino programming language


 The Arduino programming language is based on C/C++ and is designed to be easy to learn and use, even for beginners with little to no programming experience. It consists of a set of functions and commands that can be used to control the behavior of the microcontroller on the Arduino board.

The syntax of the Arduino programming language is similar to C/C++, with a few simplifications and modifications. Some of the basic functions that are commonly used in Arduino programming include:

- pinMode(): Used to set the mode of a pin on the board as either input or output.

- digitalWrite(): Used to write a digital value (either HIGH or LOW) to a pin that has been configured as an output.

- analogRead(): Used to read an analog value (between 0 and 1023) from an analog pin on the board.

- analogWrite(): Used to write an analog value (between 0 and 255) to a pin that supports PWM (pulse-width modulation) output.

In addition to these basic functions, the Arduino programming language also includes libraries that provide additional functionality for controlling hardware components such as LCD displays, sensors, and motors.

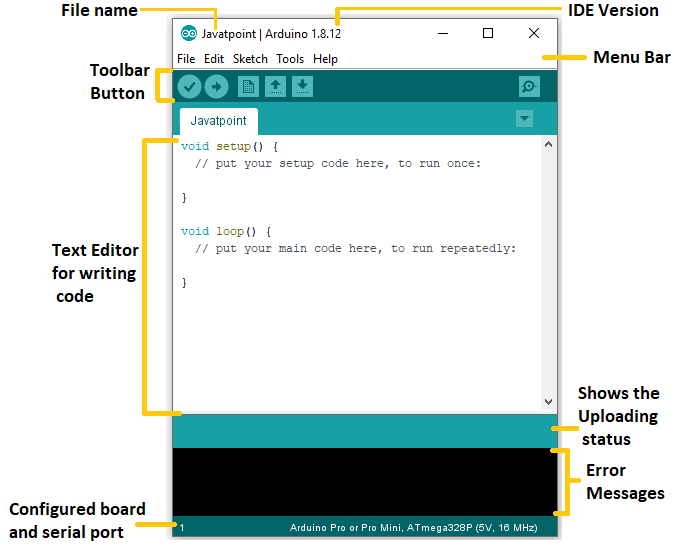
To write a program in the Arduino programming language, you need to create a sketch using the Arduino software (IDE). The sketch consists of two main functions: setup() and loop(). The setup() function is called once when the board is powered up or reset, and is used to initialize any variables or settings that are needed for the program. The loop() function is called repeatedly while the board is running, and contains the main logic of the program.

Once you have written your program, you can upload it to the Arduino board using a USB cable. The Arduino software includes a built-in serial monitor that can be used to debug and test the program as it runs on the board.

Setting up the Arduino software and connecting it to the board


 To set up the Arduino software, you will need to download the Arduino Integrated Development Environment (IDE) from the official website. Once downloaded, install the software on your computer.

Next, connect your Arduino board to your computer using a USB cable. Make sure the board is properly connected and powered on. 

Open the Arduino IDE and select the appropriate board type and port from the Tools menu. You can then create a new sketch or load an existing one. 

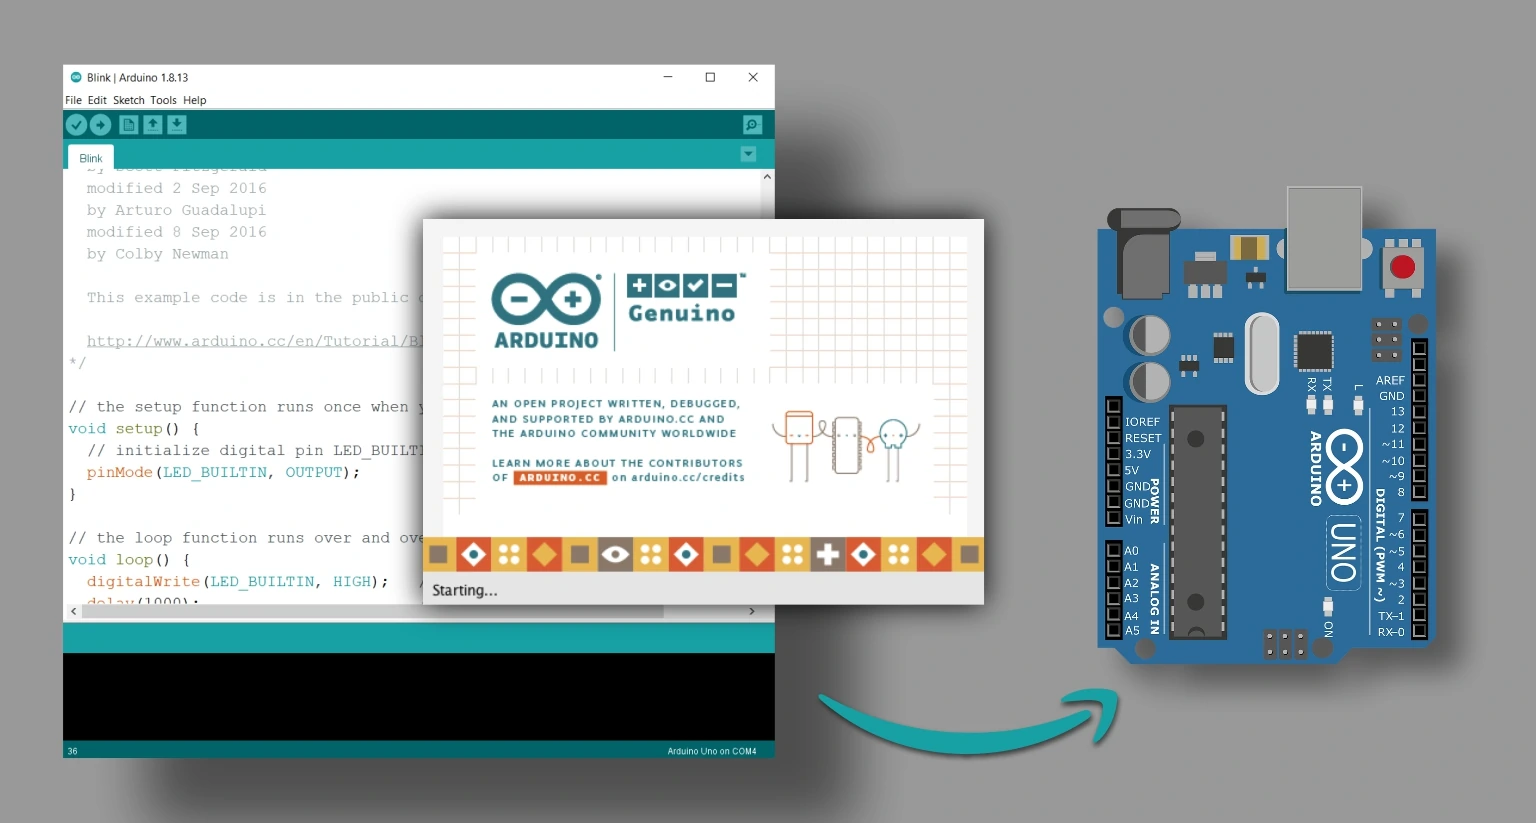
To upload your sketch to the board, first make sure that the correct board and port are still selected. Then, click on the "Upload" button in the IDE. The sketch will be compiled and uploaded to the board. You should see a message indicating whether the upload was successful or not. 

If the upload was successful, the sketch will run immediately on the board. You can monitor the output of your program using the Serial Monitor tool in the IDE.

Materials needed to start an Arduino project

 To start an Arduino project, you will need the following materials:

1. Arduino board - this is the main component of your project and comes in various types.

2. USB cable - used to connect your computer to the Arduino board.

3. Breadboard - a board used for prototyping your circuit.

4. Jumper wires - used to connect the components on the breadboard.

5. Resistors - used to limit the flow of electrical current in a circuit.

6. LED lights - used to indicate the state of your project.

7. Sensors - various types of sensors can be used to detect light, temperature, motion, and other environmental factors.

8. Motors - used to control movement in your project.

9. Power supply - used to power your Arduino board and other components.


It's important to note that the specific materials you will need will depend on the type of project you want to create. Some projects may require additional components, such as a display, a microphone, or a camera.

Different types of Arduino boards available

 Arduino boards are available in various sizes and shapes to cater to different project requirements. Here are some of the most common types of Arduino boards:

1. Arduino Uno: This is the most popular board and is recommended for beginners. It has 14 digital input/output pins, six analog inputs, and a USB connection for programming.


2. Arduino Mega: This board is similar to the Uno but has more digital input/output pins (54) and more memory.


3. Arduino Nano: A smaller version of the Uno, the Nano has a compact size and can be used for smaller projects. It has 14 digital input/output pins and eight analog inputs.


4. Arduino Due: This board is designed for more advanced projects and has a 32-bit ARM processor, which makes it faster and more powerful than the other boards.


5. Arduino Leonardo: This board has a different microcontroller compared to the Uno, which allows for more advanced features such as emulating a mouse or keyboard.


    There are also various Arduino-compatible boards available from third-party manufacturers that offer additional features and capabilities. When selecting a board, it's important to consider the specific requirements of your project and choose the board that best fits those needs.

Process of creating and uploading sketches to the Arduino board

     Creating and uploading sketches to an Arduino board is a straightforward process that can be done using the Arduino development environment.

To create a sketch, open the Arduino IDE and start a new sketch. From there, write the code for your project, using the Arduino libraries as needed to access the board's features.

Once you've written your code, connect your Arduino board to your computer using a USB cable. Make sure the correct board type and serial port are selected in the IDE's tools menu. Then, click the "Upload" button in the IDE to compile and upload the code to the board.

During the upload process, the code is converted into machine language that the board can understand. The code is then transferred from the computer to the board through the USB cable. Once the upload is complete, the code is stored on the board's microcontroller and will continue to run until the board is powered off or reset.

The process of creating and uploading sketches to the Arduino board is simple and intuitive, making it easy for users to quickly prototype and test their projects. With the ability to easily modify and re-upload code, Arduino provides a flexible platform for experimentation and innovation.

Arduino programming language

 The Arduino programming language is based on a simplified version of C++ and is designed to be easy to learn for beginners. The language includes a set of libraries that provide pre-written code for common tasks, such as controlling LED lights or reading sensor data. The development environment for Arduino is free and open-source, and includes a text editor, a compiler, and a serial monitor for communicating with the Arduino board.

The development environment, also called the Integrated Development Environment (IDE), provides a user-friendly interface for writing and uploading code to the Arduino board. It includes features such as syntax highlighting, auto-completion, and error checking to make coding easier and more efficient. The IDE also allows users to select the board type and serial port, and includes a built-in library manager for installing additional libraries.

The programming language and development environment for Arduino are designed to be accessible to users with a range of programming experience, from beginners to advanced users. This accessibility has contributed to the popularity of Arduino among hobbyists, students, and professionals alike.

Open-source hardware and software

     Open-source refers to a software or hardware product that is freely available to use, modify, and distribute. Open-source hardware refers to the physical components of a device, such as the circuit boards and sensors, while open-source software refers to the code that controls the device.

In the case of Arduino, the hardware and software are both open-source, which means that users can freely modify and distribute the code and design of the boards. This allows for greater flexibility and customization of projects, as users can modify the code to suit their specific needs.

Open-source hardware and software also promotes collaboration and knowledge-sharing within the community, as users can share their modifications and improvements with others. This has led to a large and active community of Arduino users and enthusiasts who collaborate and share their projects and knowledge.

Definition of Arduino and its components

 Arduino is an open-source electronics platform based on easy-to-use hardware and software. It consists of a physical programmable circuit board called the Arduino board, and a software development environment that runs on your computer.

The main components of an Arduino board are:

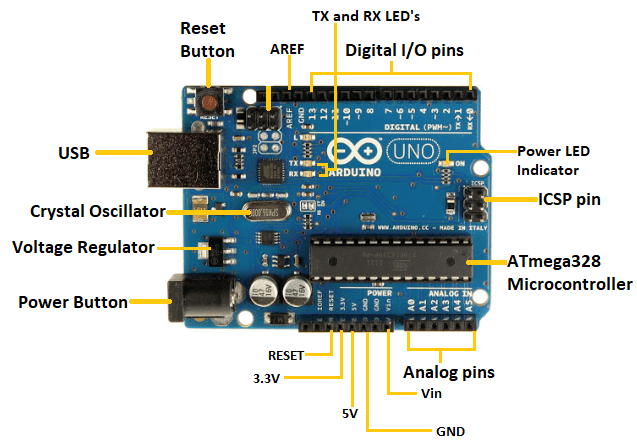
  1. Microcontroller: This is the brain of the Arduino, which processes data and executes instructions. The most common microcontroller used in Arduino boards is the ATmega328P.

  2. Input and Output (I/O) pins: These are digital and analog pins that allow the Arduino to interact with the outside world. Digital pins can be used for on/off signals, while analog pins can read analog signals such as sensor data.

  3. Power source: The Arduino board can be powered by a USB cable or an external power source, such as a battery or a wall adapter.

  4. Programming interface: This is a USB port used to upload code to the Arduino board from your computer.

  5. Integrated Development Environment (IDE): This is the software used to write, upload and debug code for the Arduino board. The Arduino IDE is free and available for Windows, Mac, and Linux.

Arduino boards also come in different shapes and sizes with various features and capabilities, such as built-in Wi-Fi, Bluetooth, or cellular connectivity.


There are several parts of an Arduino board, each with its own function. Here are some of the key components and their functions: 1. Microcontroller: This is the main processing unit of the Arduino board. It controls all the inputs and outputs and runs the code that you upload to the board. 2. Power supply: The power supply on the Arduino board provides power to the board, including the microcontroller and any attached components. It can be powered via USB or a separate power supply. 3. Input/output (I/O) pins: These are the pins on the Arduino board that can be used to send or receive signals. There are two types of I/O pins: digital and analog. 4. Digital pins: These pins can be used to send or receive digital signals. They can be set to either high (5 volts) or low (0 volts). 5. Analog pins: These pins can read analog signals, such as the output of a sensor. They convert the analog signal to a digital signal that can be processed by the microcontroller. 6. Serial communication interface: This interface allows the Arduino board to communicate with other devices using the serial communication protocol. 7. USB port: This port is used to connect the Arduino board to your computer for programming and power. 8. Reset button: This button resets the microcontroller and restarts the program running on the board. 9. Crystal oscillator: This component provides accurate timing for the microcontroller. These are just a few of the key components on an Arduino board. The specific features and components can vary depending on the model and manufacturer.

Importance of learning Arduino for electronics and programming enthusiasts

  1. Easy to Learn: Arduino's programming language is based on C++, but it uses a simplified syntax that is easy to learn and understand. This makes it accessible to beginners who may have little to no experience in programming.

  2. Hands-on Learning: Arduino is a platform for building physical prototypes and projects, which means you get to learn by doing. This hands-on approach can be a great way to solidify your understanding of concepts and ideas.

  3. Interdisciplinary: Arduino combines electronics, programming, and even design, making it an ideal platform for those interested in interdisciplinary work. This also means that you can use Arduino to create projects that solve problems in a wide range of fields, from robotics to art.

  4. Low-Cost: Arduino boards and components are relatively inexpensive, making it an affordable way to get started with electronics and programming. This accessibility means that more people can learn and experiment with Arduino, regardless of their budget.

  5. Community: Arduino has a large and active community of users who are always willing to help and share their knowledge. This means that you can learn from others, find answers to your questions, and even get feedback on your projects.

Overall, learning Arduino can be a rewarding experience for anyone interested in electronics and programming. Whether you're a hobbyist or a professional, Arduino can provide you with the tools and resources you need to bring your ideas to life. 

How Arduino works

 At its core, Arduino is a microcontroller platform that is designed to be easily programmed and interfaced with a wide range of electronic components. A microcontroller is essentially a small computer on a single chip that is dedicated to performing a specific task, such as reading sensor data or controlling a motor.

Arduino boards contain a microcontroller, along with other electronic components that allow it to communicate with other devices, such as USB ports, power regulators, and digital and analog input/output pins. These pins are what allow the Arduino to read input from sensors, control output to actuators, and communicate with other devices.

To program an Arduino board, you first write your code in the Arduino Integrated Development Environment (IDE), a software program that provides a user-friendly interface for writing, compiling, and uploading code to the board. The code is written in a variant of the C++ programming language, and can be easily modified and uploaded to the board.

Once the code is uploaded, the Arduino board executes the code, performing the actions that were specified in the program. For example, if the program instructed the Arduino to read data from a sensor and turn on an LED if the value exceeded a certain threshold, the board would read the data from the sensor, process it according to the program's instructions, and activate the LED if the threshold was exceeded.

The beauty of Arduino lies in its simplicity and versatility. With a basic understanding of electronics and programming, anyone can learn to create their own projects and prototypes using Arduino. The wide range of electronic components that can be interfaced with Arduino allows for endless possibilities, from basic LED projects to complex robotics and automation systems.

An Introduction of Arduino: What is it?


    Arduino is an open-source electronics platform that has gained immense popularity in recent years due to its versatility and ease of use. It is an affordable and accessible way for beginners to learn about electronics and programming, while also providing a powerful tool for more experienced users to create complex projects.

Arduino is an open-source electronics platform that has gained immense popularity in recent years due to its versatility and ease of use. It is an affordable and accessible way for beginners to learn about electronics and programming, while also providing a powerful tool for more experienced users to create complex projects.

Arduino boards are designed to be easily programmed and can interact with a wide range of sensors, actuators, and other electronic components. This allows for the creation of a vast array of projects, from simple blinking LED lights to more complex robotics projects, home automation systems, and even musical instruments.

Arduino

Are you interested in learning about electronics and programming, but don't know where to start? Look no further than Arduino! Arduino is an open-source platform used for building electronics projects. It consists of a programmable circuit board and software, and is easy to use even for beginners.

To get started with Arduino, all you need is a basic understanding of programming concepts and a desire to learn. There are plenty of online tutorials and resources available to help you get started. Once you have your Arduino board and software set up, you can start building projects such as LED lights, sensors, and robots.

One of the great things about Arduino is its versatility. You can use it for a wide range of projects, from simple ones like turning on an LED light, to more complex ones like building a drone. Additionally, there is a large community of Arduino enthusiasts who are always happy to help and share their knowledge.

In conclusion, Arduino is a fantastic platform for anyone interested in learning about electronics and programming. It's easy to use, versatile, and has a supportive community. So why not give it a try and start building your own electronics projects today?


Understanding Operating Systems: An Introduction for Beginners

Operating systems (OS) are an essential part of modern computing. They are responsible for managing computer hardware and software resources and providing a platform for running applications. An OS acts as an interface between a computer user and the computer's hardware, allowing users to interact with their computers and run applications.

At a high level, an OS performs four main functions: managing hardware resources, providing a user interface, managing software resources, and providing services to applications. Let's take a closer look at each of these functions:

  1. Managing hardware resources: The OS manages a computer's hardware resources, including the CPU, memory, storage devices, input/output devices, and more. It allocates resources to different applications and ensures that they don't interfere with each other.

  2. Providing a user interface: An OS provides a user interface that allows users to interact with their computers. This can include a graphical user interface (GUI) or a command-line interface (CLI), depending on the OS.

  3. Managing software resources: An OS manages software resources, including libraries, drivers, and applications. It ensures that they are properly installed and configured, and that they can communicate with each other.

  4. Providing services to applications: An OS provides services to applications, such as networking, file management, and security. This allows applications to access resources and communicate with each other.

There are many different types of operating systems, including Windows, macOS, Linux, and mobile OSs like Android and iOS. Each OS has its own unique features and capabilities, but they all share the same fundamental functions.

If you're new to operating systems, it's a good idea to start with a basic understanding of how they work and what they do. From there, you can dive deeper into the specifics of different OSs and learn how to use them effectively. With a little bit of practice, you'll be a pro in no time!


Where to buy?

Introducing latest project powered by Arduino! Looking to bring your creative ideas to life? With our Arduino products, the possibilities ar...